THE BLACK RIVER VALLEY MODEL RAILROAD WEBSITE
Crossing Signal Installation
A year ago, I installed a set of Bachmann lighted signals at the double-track highway crossing near the Black River Valley COOP on the BRVRR. The lights were operated by a pair of simple push-button switches. Operating them required two hands and took away from the enjoyment of this feature on the railroad. My grandson has been after me for months to install automatic flashers at the crossing. I searched long and hard for a suitable and affordable electronic control module for the signals. My search ended at a recent train show where I came across a Berkshire Junction display. Their Deluxe Crossbuck control system was just what I have been searching for. I chose to purchase and install the Berkshire Junction infrared detection system because it can operate in the 'dark' and because the infrared detection system usually works better with multi-track crossings. The photo essay that follows is a brief description of the installation of these signals on the Black River Valley Railroad.
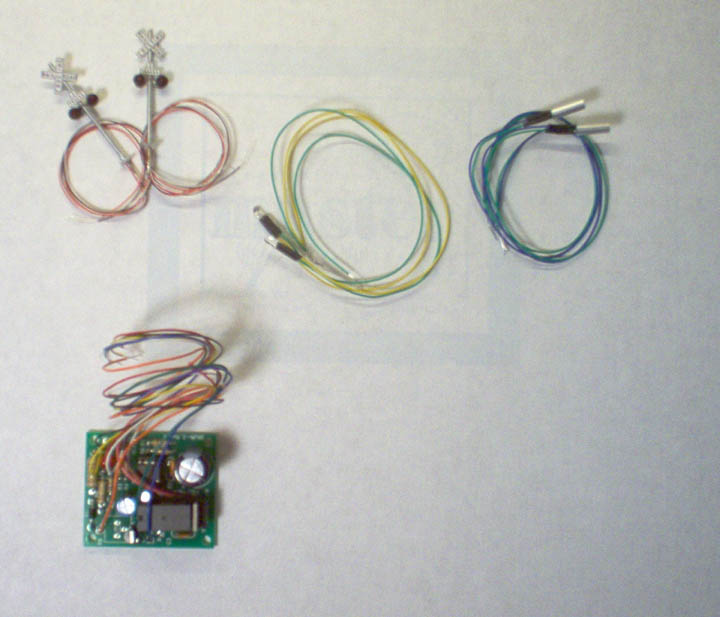
The components of the Berkshire Junction kit are shown here. The crossbucks are at the upper left. The Infrared LEDs (bulbs) are at the top center. Next to them are the directional infrared light detectors. They are directional because the silver tube around the detector restricts the sensors 'field of view'. At the lower left is the Berkshire Junction circuit board with the flasher and infrared detection circuitry. Also included but not shown is a photocopied single page instruction sheet.
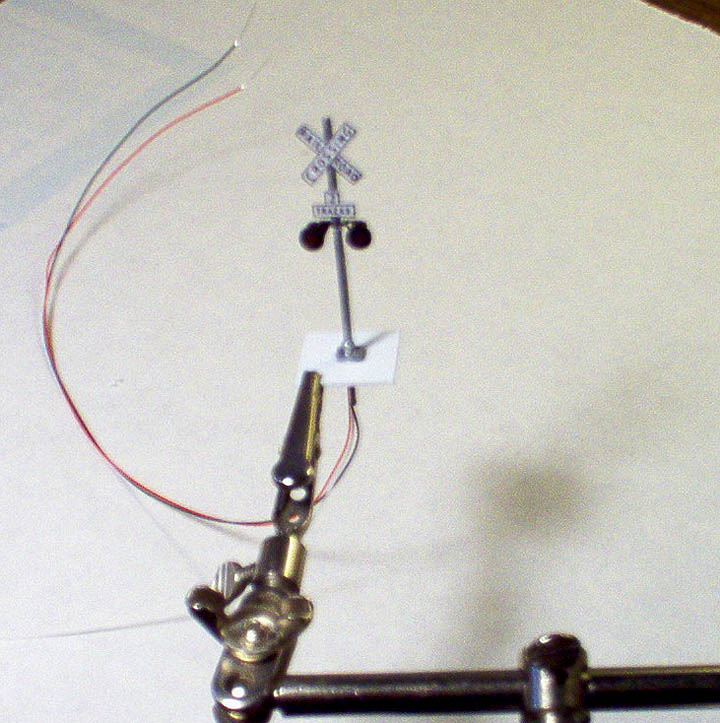
I began my project by making a base for each crossbuck from a 7/8" square x .030" thick, piece of styrene to provide stability. I attached the crossbucks to the styrene bases with a small drop of super glue.
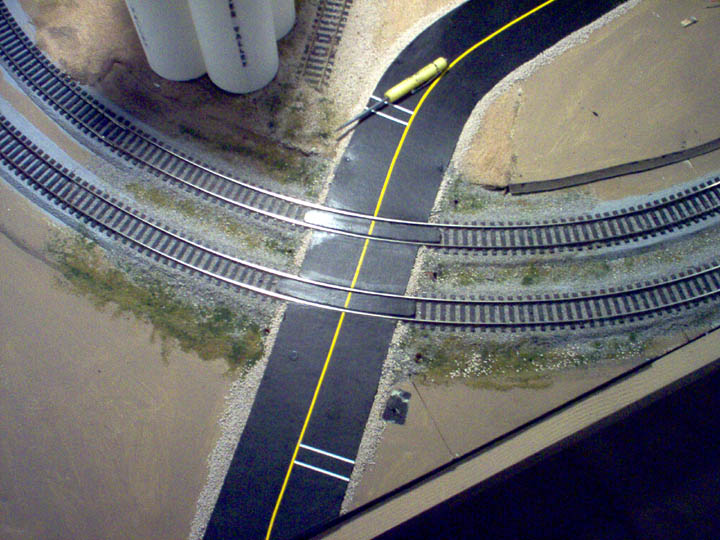
After removal of the original Bachmann crossing signals, I reused the original wire holes through the table top. The small screwdriver at the top points to one of the holes. The second hole is in the center of the dark square below and to the right of the RR crossing.

I drilled additional holes in the table top for the pairs of IR detectors and IR LEDs approximately 4" to either side of the roadway centerline and 6" apart centered on the railroad right of way. After the four new holes were drilled, I threaded the wires and glued the new crossbucks and their styrene bases into place with white glue.

For proper operation, the IR detectors have to be placed at coupler height above the level of the tracks. I fabricated a couple of bases out of scrap strip styrene and bass wood and glued it to the bottom of the detectors with super glue to achieve the proper height. I threaded the IR detector wires through their holes and glued them down with white glue. Next, I fed the wires for the IR LEDs through their holes and positioned them by bending a small 'S' in the wires to hold them temporarily in place.
Here is a view with the IR LEDs at the end of their wires above the track and the IR detectors visible below the track.
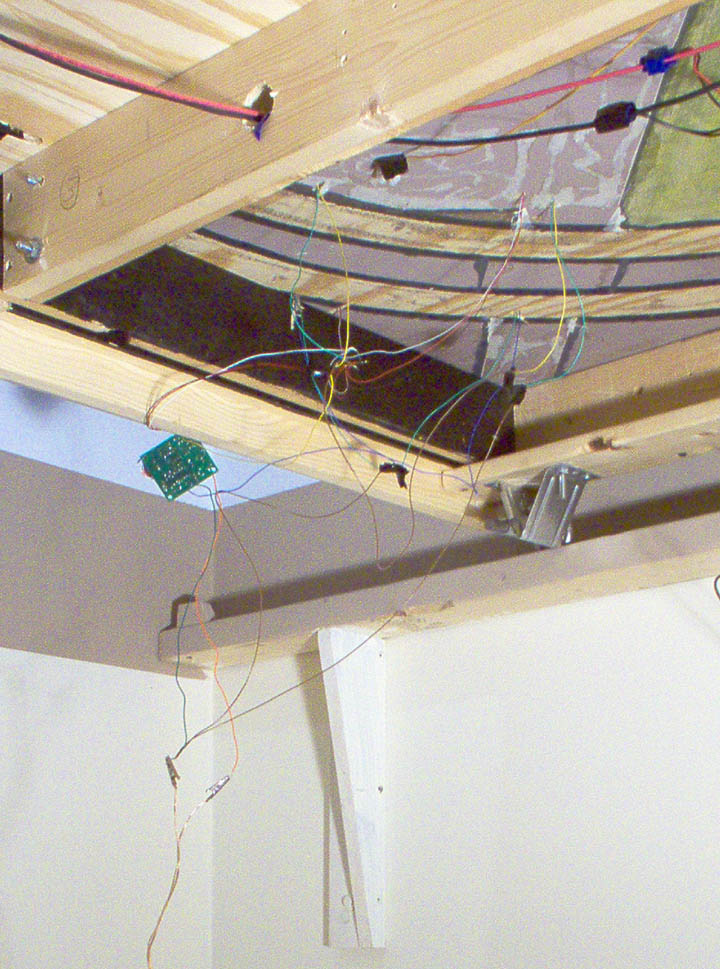
With everything, more or less in place on the top of the table it was time to connect the detection circuit to the circuit board. I connected a 12VDC power supply to the orange and green wires on the circuit board. The blue wire on the board was connected to the blue wire on an IR detector. The second IR detector is connected in series, blue to green, and the last green wire to the negative side of the power supply. The yellow wire on the board is connected to the yellow wire of one IR LED. The second IR LED is connected in series, green to yellow. The green wire on the second IR LED is connected to the negative side of the power supply. Wiring the crossbucks to the flasher circuit was simply a matter of connecting the white, black and red wires on the crossbucks to the same colored wire on the circuit board. The photograph shows all the wires connected, the board attached to a convenient nail and the 12V power supply connected with alligator clips for testing.
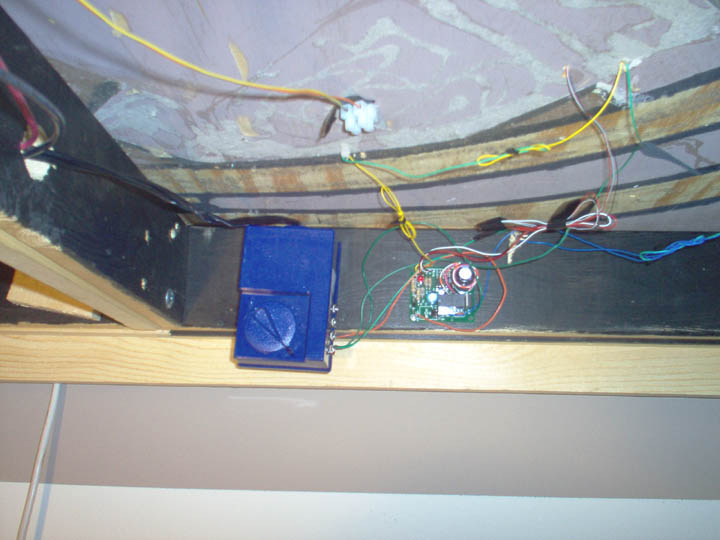
After testing the function of the detection and flasher circuits, I screwed the circuit board and the power supply to one of the main stringers of the train table. The wire connections were twisted together and taped. I coiled the extra wire to take up the slack and taped the coils. I didn't solder the connections or cut any of the wires to length because I intend to reuse the whole assembly on the next BRVRR, which is already in the planning stages.
With the wiring done, it was back to the table top to camouflage the IR components. If you look carefully, you can just see the IR LEDs concealed in the large bush and berry thicket on either side of the roadway. The bush at the top right was made with Woodland Scenics clump foliage held in place with white glue. The berry thicket, bottom right, was made with dried floral moss from the craft store, and Woodland Scenics clump and flowering foliage. I think the bush and the berry thicket do a good job of hiding the IR LEDs. As a finishing touch, I hand painted the crossbuck bases concrete.
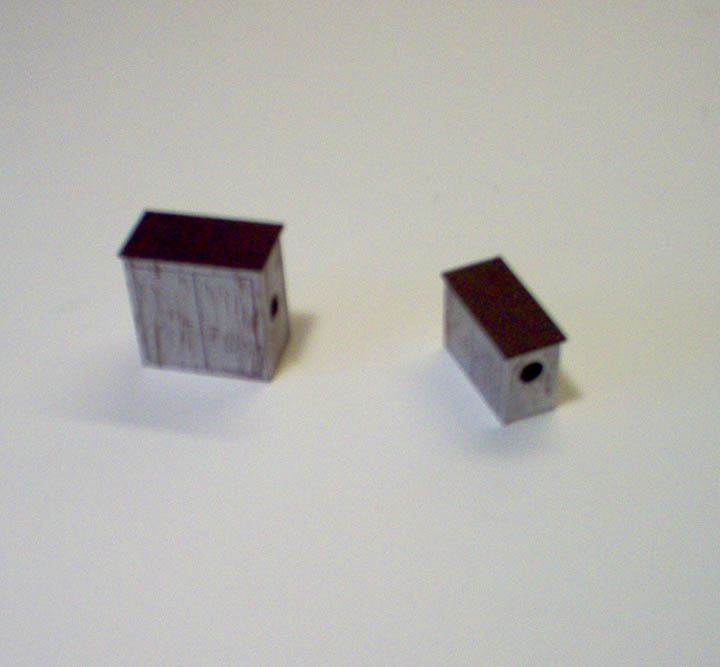
I decided to hide the IR detectors in a couple of small trackside structures. I built both structures from .030-inch sheet styrene to fit over the IR detectors and their bases. After construction I painted them silver with weathered black tops. After the paint dried I put door and panel seams on the faces with a fine tipped black Sharpie. I weathered them a little by dry brushing boxcar red and weathered black paint on the appropriate surfaces.
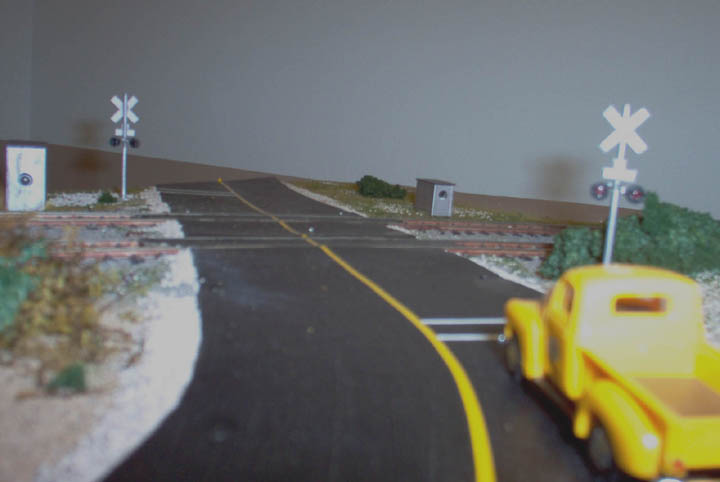
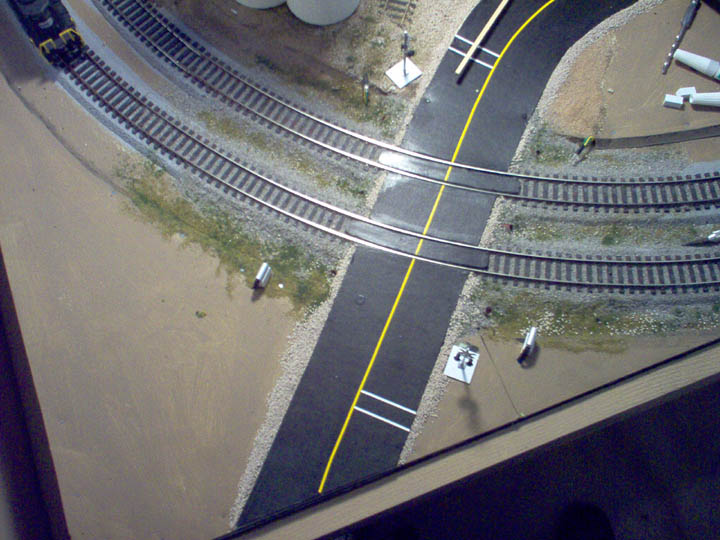
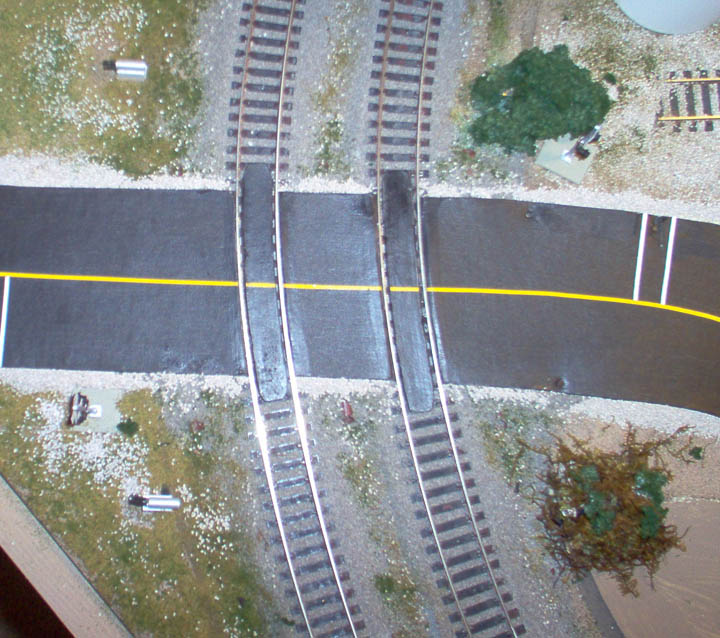
This photograph shows the completed railroad crossing. The finished equipment boxes, bush and berry thicket can be seen to either side of the roadway. I put down some basic gravel, ground cover, and a few small shrubs held in place with white glue to scenic the area. A Chevy pick-up completes the scene.
For just $50.00 the BRVRR now has an automated double-track crossing with operating flashers. There are still two unused connections on the circuit board. Crossing gates and bells are in the future.