THE BLACK RIVER VALLEY MODEL RAILROAD WEB SITE
Building Track Cleaning Cars
I have been cleaning the tracks on the Black River Valley Railroad with alcohol or Goo Gone using a soft cotton rag and lots of elbow-grease. Although it is always a chore it only needs doing a couple of times per-year. Until recently I never thought of dedicated track cleaning cars. "Bear" on the Model Railroader Weekend Photo Fun thread presented a brief tutorial with photos on how to make your own track cleaning cars using Athearn BB box cars. Since I have more than a few such cars I decided to give it a try. The photo essay below is the result.
The first step was to choose a few likely candidates to be converted into track cleaning cars. The three box cars chosen were Lackawanna #51969, Pennsylvania #30812 and Southern Pacific #127431. All are Athearn BB kit cars acquired over a number of years.

I disassembled the cars and laid them out with the car deck down on a solid piece of ply wood and drilled two .098-inch holes through both the metal weight and the floor of the box car. The holes are 1-1/8-inches apart, centered left to right, front to back on the car chassis.
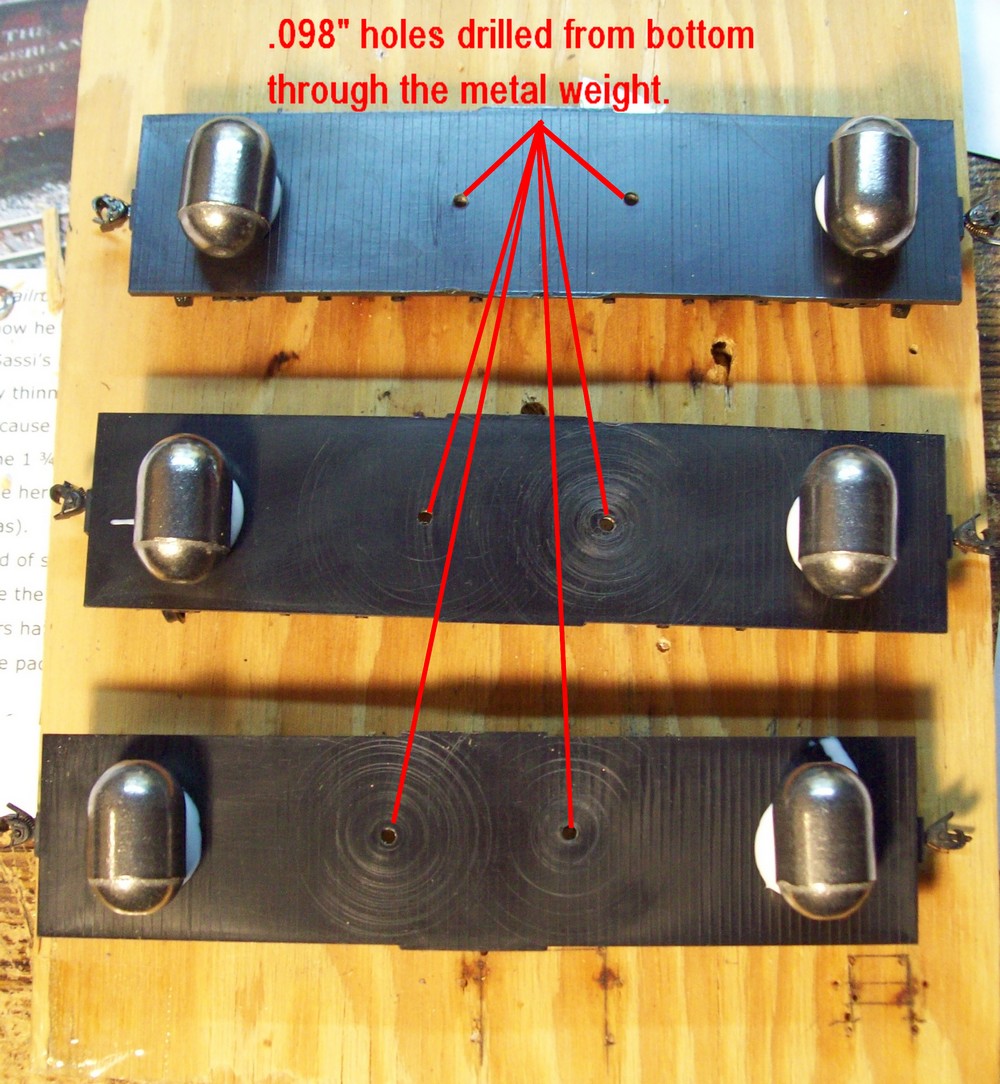
The hole size was based upon the .088-inch diameter of the nail shafts I used. The extra 10-thousands was to ensure free movement of the nails in the holes. The steel 3/4-oz. weights shown were purchased in the fishing section of the local Wal-Mart and fastened in place with Aleene's Tacky Glue. The extra weight help the cars track better and absorb the occasional "bump" as the cleaning pad rides on the rails.
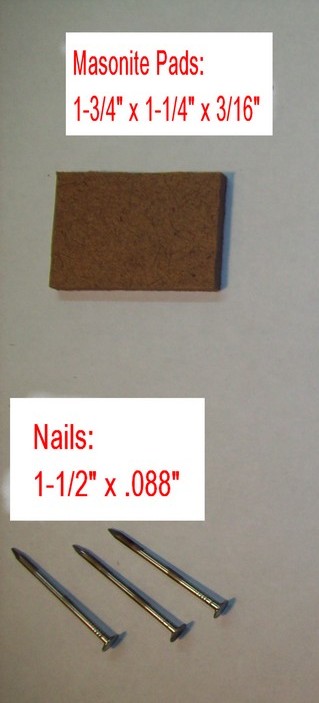 The plan called for 1-inch by 1-3/4-inch Masonite pads, but initial trials conducted with the first "test" car indicated the narrow pads didn't like to track well on my BRVRR's 20-inch radius inner main line. To ensure proper tracking I increased the cleaning pads to 1-1/4-inch by 1-3/4-inches.
I used 1-1/2-inch long flat head nails with an .088-inch diameter as guides for the cleaning pads. The nails are attached to the pads with 'super glue 1-1/8-inches apart, centered left to right, front to back on the cleaning pads.
 Notice the bevel at the leading and trailing edges of the cleaning pad. This bevel is critical. Some bevel is needed to allow the pad to slide over any imperfections in the track work, most importantly joints and turnouts. Not enough and your car (train) will come to an abrupt stop.
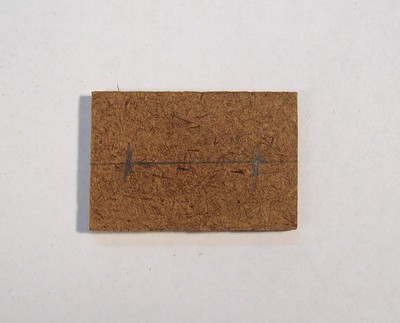 To locate the nails, I first found the longitudinal center line of the cleaning pad. Then I centered the nails 1-1/8-inch apart, which left 5/16-inch on either side of the 1-3/4-inch pad. I marked the locations as shown.
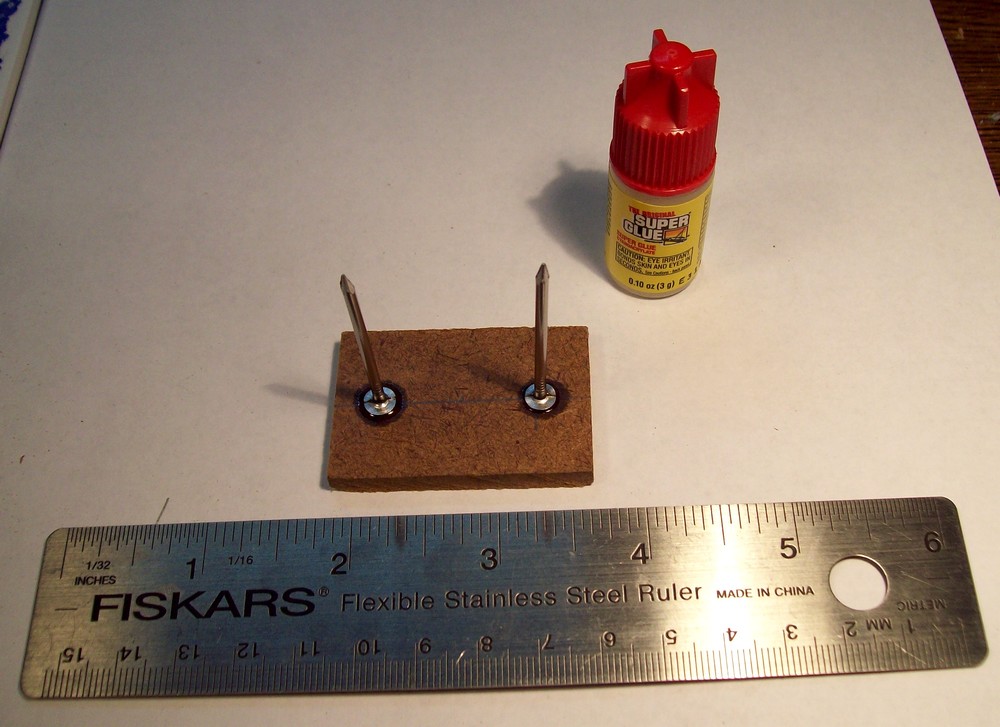
After locating the nails, they were glued into place with super glue. The thin liquid shown produced a bond but it didn't seem secure enough so I used a "No Run Gel" super glue which produced a much more substantial bond.
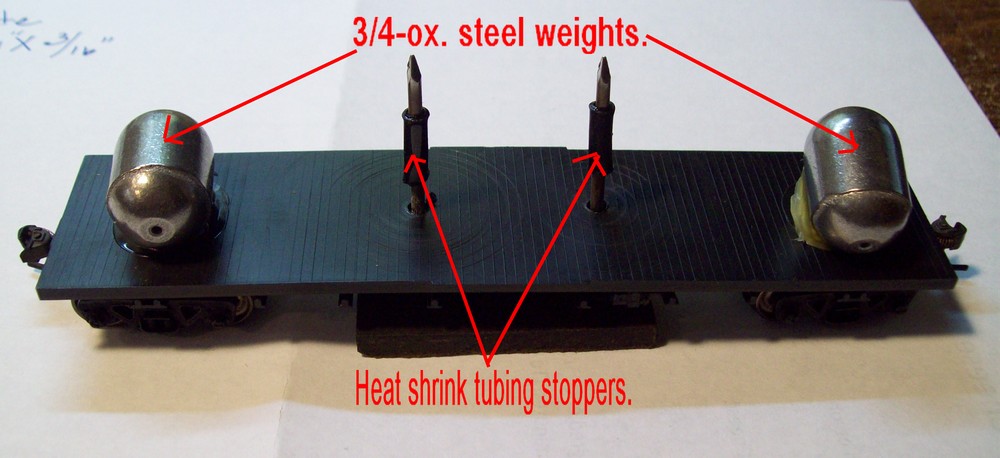
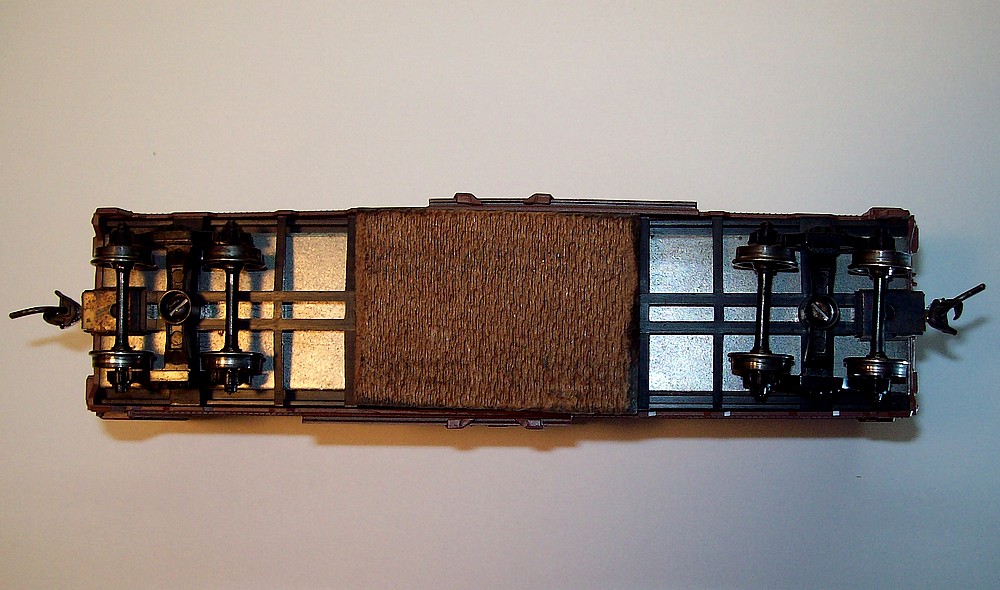
Here are all of the hidden parts in place. Once the glue was dry I inserted the guide nails through their holes in the car floor. I thought briefly about spring loading the pads but discarded the idea as overkill. I used heat-shrink tubing as stoppers on the nails to prevent the cleaning pads from "falling out" when the cars were removed from the layout. I allowed for about 1/2-inch of movement just to be safe. After checking for free movement of the cleaning pads and making sure the stoppers and weighs were secure I installed the car bodies on their respective chassis.
The track cleaning cars work as advertised. The cleaning pad on this car shows the results of about twenty laps on my BRVRR's 24-foot mainline. The track isn't too bad since I cleaned it with Goo Gone and a soft cloth about two weeks ago. The marks on the pad prove the cars are effective.
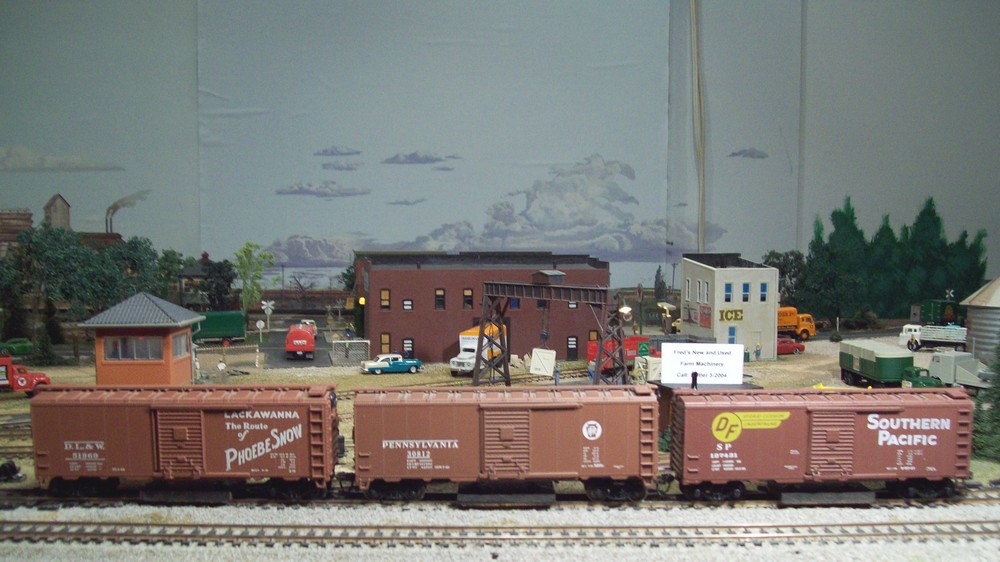
Here is the result of the track cleaning car project. The three converted box cars, Lackawanna #51969, Pennsylvania #30812 and Southern Pacific #127431 are shown coupled together after a test run.