THE BLACK RIVER VALLEY MODEL RAILROAD WEBSITE


STRUCTURES
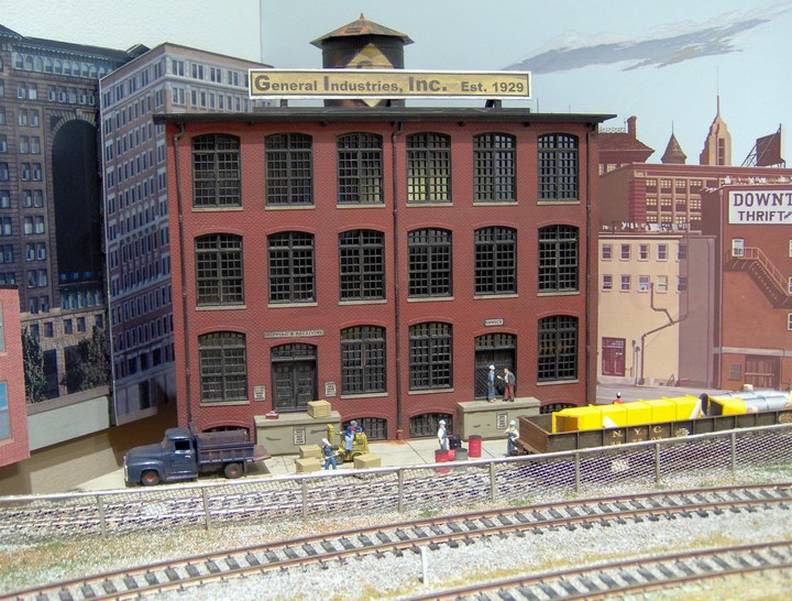
General Industries fills a spot on the southeast corner of the layout. The name came from a local business that was destroyed by fire nearly two years ago. The building front is Walther's Fireproof Storage & Transfer Background Building. I mounted it diagonally on the corner and built side walls and a roof from black foam-core to give the building some depth and provide stability. I mounted a water tank from the scrap box, on the roof to give it more definition and lighted the interior. The signs and logo were made on my home computer. I weathered the building, yard and gondola with POLLY Scale 'Rust' and 'Dirt' thinned with alcohol. The gondola load, a Scene Masters item, was hand painted with Testor's paints to give the area some color. The dunnage was made from a scrap piece of balsa and a few bits of basswood. The figures came from Woodland Scenics, Bachmann and Life-Like. I think the General Industries building adds some much needed depth to this corner of the layout.
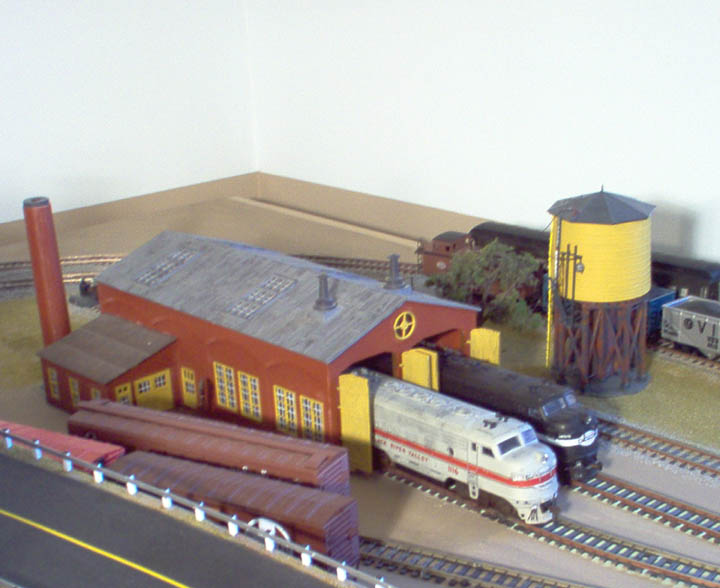
My two-stall engine house, an IHC kit, was the first structure built for the BRVRR. This little model migrated to the current BRVRR from a smaller predecessor layout of the same name. The exterior walls are painted with a flat brick red primer from Wal-Mart. The roof was dry brushed with Grimy Black to raise a few highlights. The trim was hand painted with ATSF yellow. The interior detailing isn't much, just a 'shadow' pit, but the building is lighted. It easily accommodates a F7 or GP40 and even my BLI Mikado, but is too small for my NYC 'Niagara'.

Farmer's Union grain elevator has replaced the more modern Black River Valley COOP. The new model, like the old one, is from Walther's. I think the wooden rural grain elevator fits into my operating era better the concrete structure it is replacing. Most of the weathering is finished and lighting has been installed and tested. It was necessary to relocate the elevator's siding to allow for more structures on the town site. I fashioned the two small bins from a tin can, a piece of .030-inch styrene and some odds and ends from my scrap box. Still to come are more vehicles, people, and shrubbery. I am pleased with the progress so far.
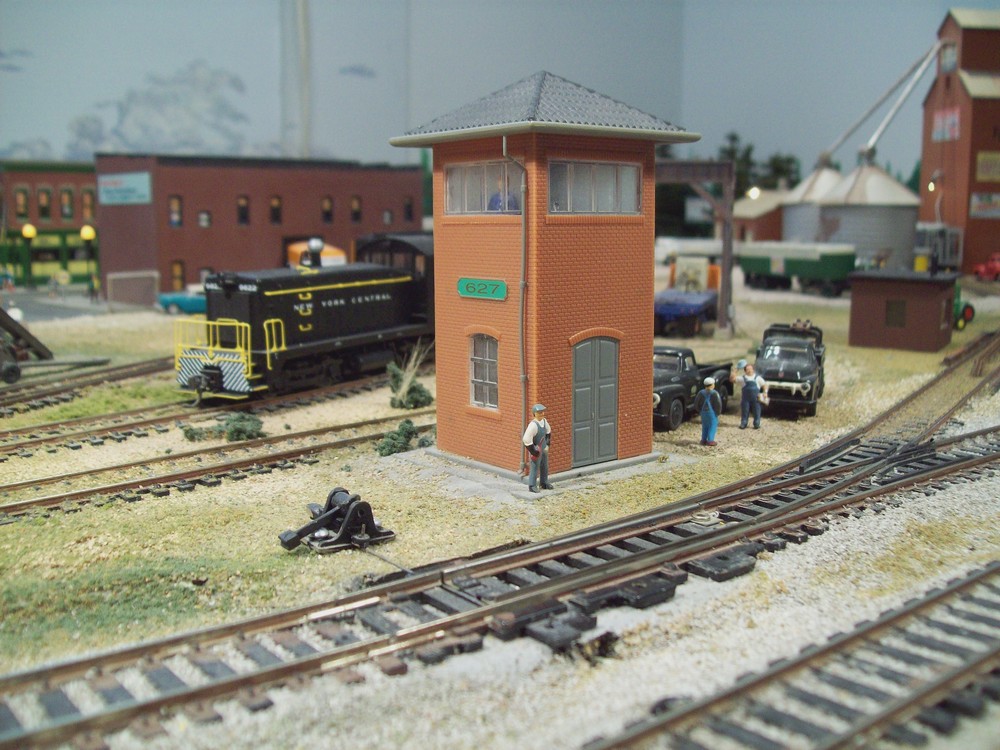
Grafton Tower has been on the layout for a very long time. For whatever reason it has been absent from the "Structures" page on the website until now. It is, I believe an unmodified Bachmann structure kit. It is located on the north side of the BRVRR layout between the eastbound (inner) mainline and my DCC programming track. The sturcture is lighted with a red grain of wheat bulb for night operations. I placed a tower man on the east side looking down the tracks. He is visible if you know were to look. Another railroad figure is place near the tower door on the ground level. Adjacent to the tower are acouple of more figures and two NYC maintenance vehicles which help give the scene life. Some day in the future, this basic structure will be replace by a replica of the actual Grafton Ohio Tower. Until then this little structure will have to do.

The Redwing Flour Mill was the third major structure I built for the Black River Valley Railroad. A Walther's kit, it took about a week to build. The exterior walls are painted light beige to simulate aged concrete. (They look yellow in the photograph because of the lighting.) The roof is weathered black. Most of the vents, dust filters and other exterior fixtures are silver. I added some additional roof vents from a Walther's accessory kit to clutter up the roof a little. The Redwing flour mill is one of the BRVRR's major customers. Like the Black River Valley grain elevator, which has been replaced, this model is really too large for the layout. It is a nice model and will do until I find something better. Lighting it properly turned out to be my biggest problem with it. For now, I'm using a cylinder of white paper to act as a diffuser. Someday I'll install interior 'floors and walls' and multiple light bulbs.
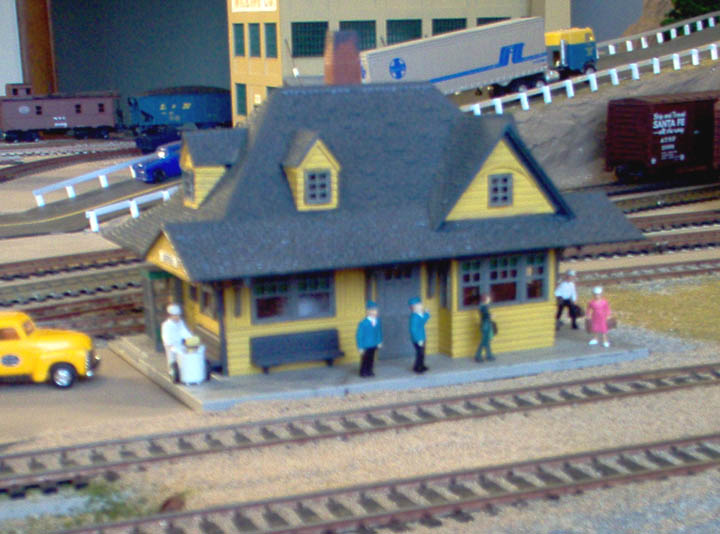
Black River (formerly Berea) Station is an Atlas kit. It was a complex little bugger. Lots of small parts, but it turned out pretty well. It was hand painted ATSF yellow. The trim is UP Harbor Mist Gray. With the addition of a few people figures to give it life, the station serves my purpose admirably. In the near future I intend to replace the base with something larger and extend walkways across the railroad right of way for better passenger boarding. The structure is lighted, but the openings in the exterior walls are so small that very little light escapes.
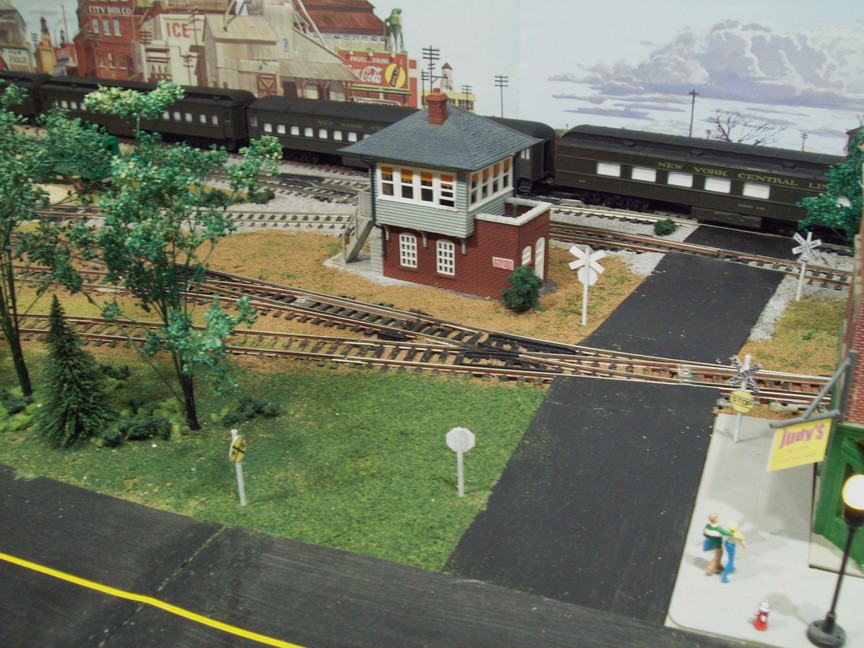
I built Black River Tower from an Atlas kit I originally purchased for a project on the Atlas Forum. Although basically stock, it does have interior lighting, white light on the ground floor and red light in the tower. I installed a railroad figure on the upper floor. If you look carefully, you can see him peering out the window. The tower is installed on the layout near the Black River Station/Engine Terminal/Yard in place of the old control tower. I moved the old control tower to the commercial switching interchange at Grafton. I have to finish the detailing yet, but it looks better than the tower it replaced.

Barron Oil Company is named for the fuel distributor in the small town in Michigan where I grew up. It is my version of Walther's 'Interstate Oil'. The main structures are entirely hand painted with Floquil paints. The 'TEXACO' decals came from the Walther's kit, as did most of the other visible decals. The Barron Oil roof sign was made on my home computer and printed on plain white paper, glued to the frame and backing that I made from styrene. I added a few people, barrels and the trucks to give the scene life. The main building is lighted, but like Black River (formerly Berea) Station, not much light escapes from the small window and door openings.
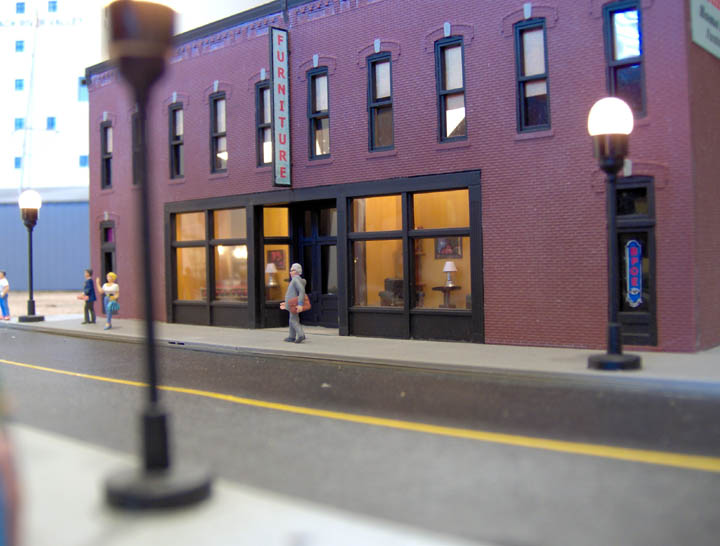
'Oostings Furniture Store' is a name and place from my childhood. My version is a lightly bashed Smalltown USA's 'Furniture Showroom' kit. I removed about an inch and a half from each of the end walls to make the building narrower and a better fit on the layout. I had to adjust the roof panel height a little to accommodate the change, but it worked out okay. I painted the exterior with the red primer I bought at Wal-Mart. A wash of thinned white acrylic was wiped off before it dried to bring out the highlights in the brick. The interior was spray painted flat black and the window frames, doors and exterior trim hand painted. I built and installed lighted window displays of home furnishings from a Model Power Interior and Lighting Kit, to bring the front of the building to life. The windows are clear styrene. I made the window shades and the 'Furniture' sign with Microsoft Paint on my computer. The display windows and building interior are lighted by a custom built, 3-bulb chandelier. A few dry transfer decals and signs were applied to the outside, back and ends, of the building to break up the large brick wall areas a little.
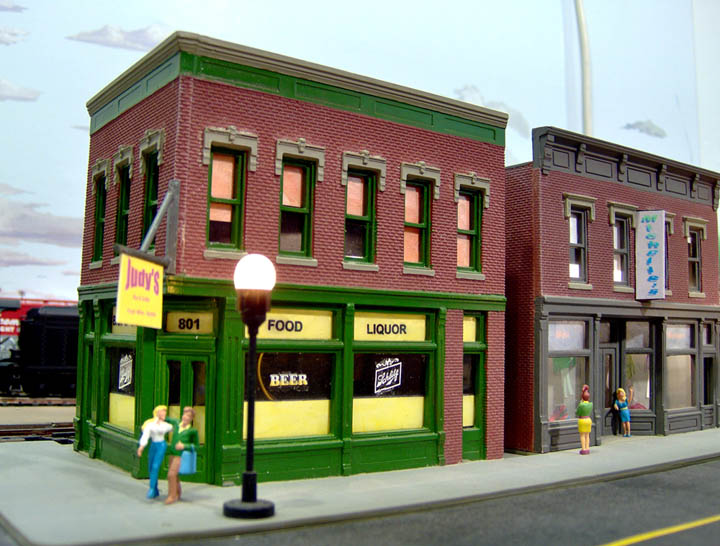
Judy's Bar and Grill is a Design Presrvation kit. I built it without bashing it too much. I followed the same general steps for finishing the exterior of Judy's that I used for Oosting's Furniture Store above. Although I did install a simulated tile floor in the bar, there is no real interior detail, just a view block of black construction paper.The sign was made on my home computer. Here I chose to suspend it from a pole. The sign support is made from styrene shapes glued together. The sign itself is glued to a small piece of manila folder to give it some substance, and glued to the support pole. Looks pretty good, if I do say so myself. The interior of Judy's is lighted with a single bulb. The window shades and 'cafe' decorations in Judy's a were also made by computer and applied to the interior of the windows with clear latex wallpaper cement. I applied a few Woodland Scenics dry transfer decals on the windows and exterior walls and added vent pipes to the roof for added detail.
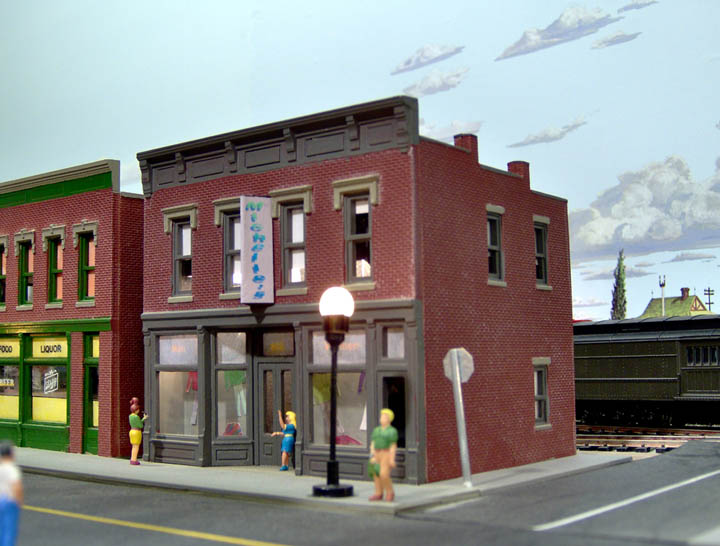
Michelle's Fashions is a Design Preservation kit. I finished the outside using the same techniques I used on Oostings and Judy's above. I fashioned window displays of clothing for Michelle's with paper images generated on my home computer. The store sign was also made on my computer, printed on white paper and glued to manila stock. I glued it right to the structure with 'gel' super glue. Michelle's is lighted with a home-made, multi-bulb chandelier to light the window displays and building interior.
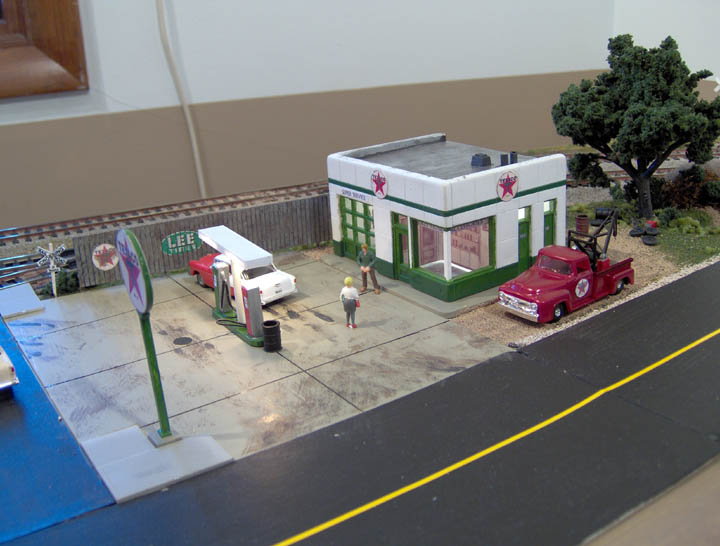
Here is my Texaco gas station. It is a City Classics kit which I bashed a little by reducing the building to one bay. This was necessary because the lot I had picked out for it was too small for the full sized 2-bay station. Painting this beastie was a real chore. First I painted the interior flat black. Then the exterior white. Then finally the trim with dark green. The roof is painted with silver to simulate rolled roofing and highlighted/weathered with grimy black. The Texaco logos and signs were made on my home computer. I installed a scanned copy of the original paper office wall and interior details. The interior is lighted with a small structure bulb and the gas island is illuminated with two 'grain of wheat' bulbs in a custom fixture. The property fence came from Walther's Team Track kit.

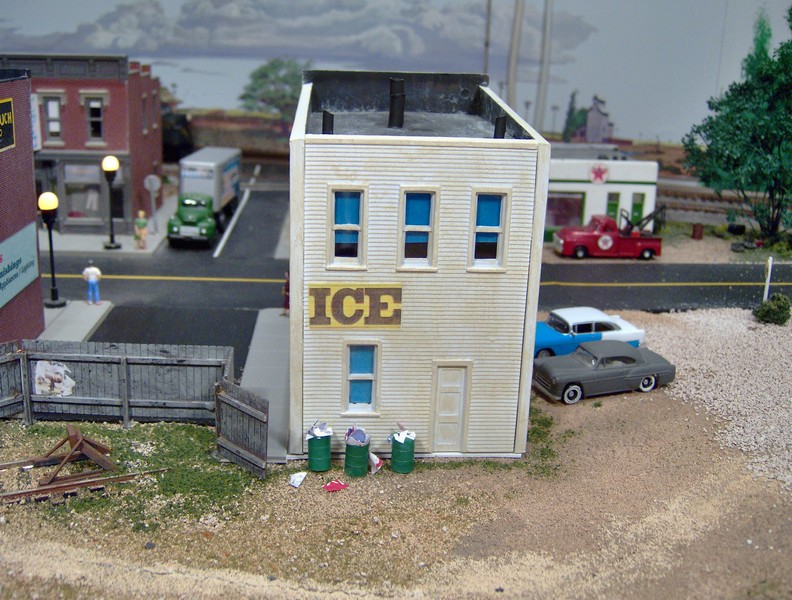
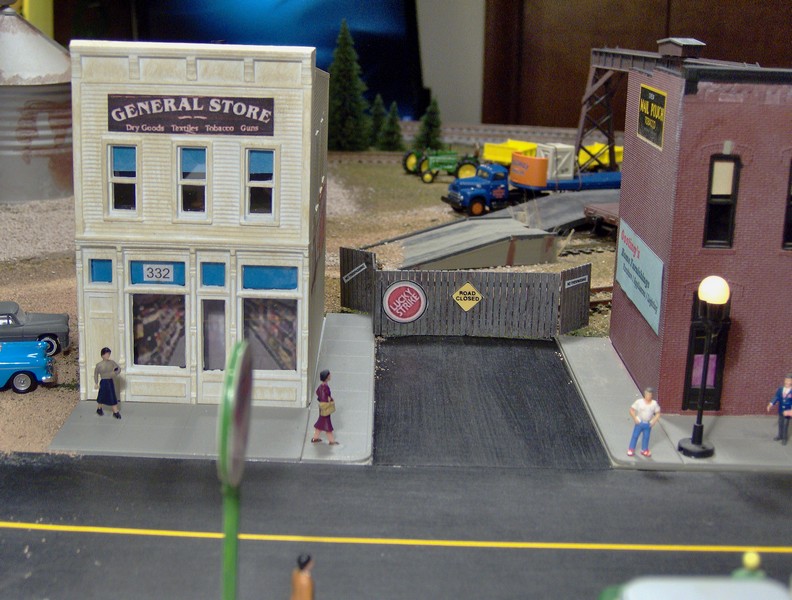
I decided to enhance the scene with a new fence and a few details to bring it to life. First I added a bit to the ground cover in the parking lot and around the back of the structure. Then I added the wooden fence, left thumbnail, to separate the team track/industrial area from the street end. The fence came from the Walther's Team Track kit. I added a few signs printed on my home computer to the front and back of the fence to give it some character. I made the gates at the end of the sidewalks movable with soft copper wire hinges. Then I painted and placed a group of trash cans from my bits and pieces box along the back wall of the store. Right thumbnail. Still a little way to go but the overall effect is pleasing I think.